Beauty ,Wellness, Styling Blogs | Cult Cutter Blogs

  • Beauty
  • Wellness
  • Styling
  • Visit Website


Oh the horror of that moment when you are having a good day and someone tells you, you look tired! Your dark circles can make you look exhausted even on the best of days. Obviously then, you need to do something about them, panda eyes.


Follow these steps to get rid of those dark circles and add life to your makeup look...


Prep up:


The first step in makeup is prepping your skin. Always start by hydrating your skin. If you want to cover your dark circles or hyperpigmentation, make sure your skin is ready for all the products you are going to layer it with to cover the darkness. Use a hydrating face mask or under eye mask before makeup. If you don’t have an under-eye mask, use some deep moisturising serum or moisturiser under and around your eyes.


If you are trying to cover pigmentation around your mouth, use a little bit of eye shadow primer around your mouth as it works well to hold onto any product placed on top.


Read more

  • 0 Comments


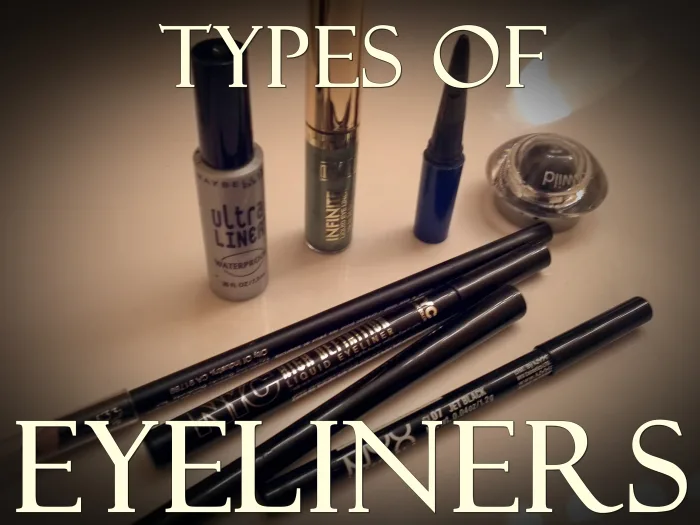
When to Use Which Eyeliner

There are many varieties of eyeliner on the market today. Unfortunately for us, there is no omnipotent eyeliner out there, all of them are separated into different categories that are designed for different uses around the eye. These are the ones we see most often in the cosmetic industry.


Most Common Eyeliners in the Cosmetic Industry

  • Liquid eyeliners (brush applicator)
  • Felt-tip eyeliner (also called art liner)
  • Gel or Cream eyeliner
  • Kohl Pencil Eyeliner
  • Kajal Eyeliner
  • Regular pencil eyeliner
  • Mechanical twist-up eyeliner
  • Eyeshadow (used as eyeliner)

If you are concerned about any ingredients you see on an eyeliner, please visit the FDA's website for an approved list of chemicals.


Read more

  • 0 Comments


Heading to the nail salon or taking time for a DIY manicure is always a treat, but with so many shaping options, it can be tricky to choose. Should you do almond? Try square? Squoval? We asked nail professionals for the scoop on what nail shapes are in style and most popular so you can find the best one for your hands.


First, to find the best nail shape to flatter your hands and fingers, first check your cuticles, advises Fleury Rose, a celebrity nail artist in Brooklyn, New York. If you have an oval cuticle shape, she recommends matching it with an oval nail shape.


Here, our guide to the different nail tip shapes, including options for short, long, natural, and acrylic nails, whether you're looking for something classy, simple, fun, or a strong statement shape so you know what to ask for at the salon or create yourself for a perfect manicure:


1. Round-Shaped Nails

This simple shape is perfect for short nails (even nail biters!), extending only slightly past your nail bed and maintaining its natural shape. It's also the most popular nail shape: When they visit the salon, most women opt for this classic silhouette, Rose reveals. This shape is also perfect if you want strong nails, recommends Ava Shamban, M.D., a dermatologist in Los Angeles and author of Heal Your Skin. With this shape, nails are less likely to tear or break, making them healthier.


2. Square-Shaped Nails

If you want a shape other than a natural rounded one that doesn't take a ton of effort to maintain, try a square style with the tip filed flat. You don't need much of a tip to achieve it, so this look is great for shorter nails. If you're concerned with short or chubby fingers, though, Rose says to grow nails out a bit longer: "Short and square is the hardest shape to wear, as it can make hands appear stumpy."
This version of square nails is popular and universally flattering for a reason: It's a little softer than its more angular counterpart, but still looks put-together and is a great canvas for simple nail art.


4. Oval-Shaped Nails

If you have longer nails and desire a more feminine look, try this shape. Oval nails also make your hands look longer, so if you want to slim the appearance of your fingers, this is a good way to go.


Read more

  • 0 Comments


Ever took a pretty white top to the trial room only to find foundation smudges around the collar? Or worn a stunning ruffled shirt and found your foundation smeared all over halfway through the day? We don’t get it, because your foundation is supposed to sit on your face and not smudge all over your clothes. However, we see a lot of women complaining about this therefore here are a few tips that will help...


Invest in a good quality primer


Primer is one of the most underrated products in makeup world. Right from blurring wrinkles to minimising the appearance of pores, a primer is essential to mattify and create a velvety base for long lasting makeup. The Lakmé Absolute Blur Perfect Makeup Primer is a waterproof formula that stays put all through the day.


Use matte foundation


Indian weather demands matte foundation all year long, especially if you have oily skin. Apply thin layers of foundation or use a matte formula that will prevent makeup stains. The Lakmé 9 To 5 Flawless Matte Complexion Foundation is the perfect formula designed for daily wear, it blends effortlessly and gives a flawless finish. 


Do not forget a compact


A matte compact is essential, particularly during summer when your pores re working overtime to produce extra oil. Prevent this by patting some of the Lakmé Sun Expert Ultra Matte SPF 40 Pa+++ Compact it absorbs all the oil from your face and gives an ultra-matte finish.

Read more

  • 0 Comments


Contouring is a trending way in Beauty that has elevated makeup to a whole other level—and for the better. This makeup technique involves using dark and light colors to enhance or slim down creating the appearance of higher cheekbones and a slimmer nose and chin. but with the right products and equipment, it's easy to do on your own. 

Once you've applied your contouring makeup, remember to blend well for a flawless, natural look. However, contouring does require some practice and knowledge in order to achieve a flawlessly sculpted face. Read and learn a step-by-step guide to creating the How to apply on your face and Join Cult Cutter for more Advance Skills and techniques.


How To Contour In 5 Easy Steps -

Now that you have decided which product is suitable for your face, let's get into how to apply it to your face.


Step 1. Apply Primer and Foundation

Firstly You have to apply moisturizer, primer, and a powder foundation or liquid foundation (depending on preference and skin type) on your face. Apply your foundation using a makeup sponge or a foundation brush like the CULTCUTTER Flat Foundation Brush. If using a powder foundation, you may want to apply a finishing powder or setting powder as well.


Step 2. Contour Your Forehead


If you're new then the easiest way to get started with a powder contour and a contour brush. Begin by lightly dusting contour along the hairline, blending the product smoothly from your head to about one-third of the way to the center of your forehead.

Step 3. Contour Your Cheekbones and Jaw


After the contour around the hairline is well-blended, move down to the hollows of your cheeks. (If you don’t know where this is, suck in your cheekbones) Move the brush along that indentation, toward the center of your face, and then back out.

Once the contour along your cheekbones is blended, finish by applying contour just underneath your jawline from the bottom of your ear to just before the point of your chin. When you put all these steps together they should form a tree-like shape.

Step 4. Contour Your Nose


This is not necessary But Adding a bit of contouring to the sides of the nose is a great extra step to add if you want to boost your contouring routine. You’ll actually want to start this step by applying a highlighter along the bridge of your nose. Then, using your normal contour color, apply two lines of contour on each side of the highlight (along the sides of your nose) and blend until smooth.

Step 5. Finish with Highlighter & Bronzer


As a Last final step, finish by applying a highlighter and applying bronzer. For knowing top product picks, and want to know more extra skills check out our website which features the best session and the best product knowledge for the ultimate look.

If You Like this article? Share it with your friends by clicking the icons below!


  • 0 Comments


Learning how to apply makeup may not be rocket science, but it is not the easiest task either. Especially when so many makeup looks and trends keep cropping up each day. Dewy makeup is one look that has many takers and for all the right reasons. I mean, who doesn’t want skin that looks glowy AF?

You don’t always need the golden-hour light to get pictures with the perfect glow on your face, dewy makeup look can do that for you. Here’s how to ace the dewy makeup look in a few easy steps…

Step 01: Prep and prime


Cleanse your face thoroughly and then apply a moisturiser or face oil depending on your skin type. Allow your skin to absorb it completely before moving on to the next step. To get the perfect base it is essential to first apply a primer, it will give you a smooth canvas for your foundation and other products to glide on. The Lakme Absolute Under Cover Gel Face Primer evens out skin texture for the smoothest skin ever.

 
Step 02: Ace the base


Now that your skin is ready for makeup application, use a concealer to cover dark spots and dark circles then move on to your foundation. An easy trick here is to mix a few drops of face oil with your liquid foundation to get that illuminated look or simply use the Lakme Absolute Argan Oil Serum Foundation which is infused with the goodness of argan oil. Apply the base using a damp makeup sponge for the perfect glow.

Read more


  • 0 Comments


Here's the annoying thing about foundation: When it's expertly applied, it can turn your face into a perfectly even, bright, smooth-looking pearl. But when it’s applied, uh, not so well, it has the potential to highlight fine lines you didn’t know existed, make your skin look flaky and oily, and leave you with a chalky-looking mask. Fun!

You may be able to find the same content in another format, or you may be able to find more information, at their web site.

Unfortunately for me, but luckily for you, I have experienced both the bad and the good sides of foundation. Which means I've now got a lifetime of tips and tricks that will revolutionize your makeup routine, so you'll never deal with another patchy, shiny, heavy mess again.

STEP 1: PREP YOUR SKIN


Don't skip this step. Let me repeat that: do not skip this step. Makeup has the tendency to settle into creases and crevices of dry skin, so if your face isn't properly cleansed and moisturized first, you can forget having seamless foundation.

After cleansing with a gentle face wash, massage a lightweight moisturizer over your face, (along with any other skincare products you usually use in the morning), then wait a full 15 minutes for everything to sink in before proceeding to your makeup.

I could write a thesis on how to difficult it is to find your perfect foundation shade (it takes a lot of trial and error...and bad photos), but for the sake of your sanity, I’ll keep it brief:

The Coverage

Most foundations fall somewhere between sheer, medium, and full coverage. If you love your freckles, choose a formula that says "sheer" or "hydrating" or "lightweight." If you want to even out your skin tone a little, look for a medium-coverage formula, which might say "semi-matte" or "satin" finish. And if you have blemishes, redness, or hyper-pigmentation that you'd prefer to cover (or, if you just love a full-face beat), go with the formula that has more coverage, which will usually say "full-coverage" or "matte."

The Shade
Now that you know your coverage and finish, you can finally match your shade. I’ve tried every trick on the internet, here—undertones, neck swatches, you name it—but the best way that I’ve found is to, well, simply put it all over your face like you would in real life, then look at it under different lighting. Natural light from the sun is the most accurate and unforgiving, so if it looks good outside, you’ve most likely found your match.

Obviously, this requires you to get a sample of foundation, first. Sephora and department stores will give you little pots of foundation to take home and sample before you buy, and most drugstores—although it's not exactly fun—will allow you to return opened makeup products with a receipt...and a very apologetic look.

Read more
  • 0 Comments


False eyelashes are a great option for individuals who may think their own lashes are too short or not full enough, even with the aid of mascara. For those in the theater and entertainment world, false eyelashes are a must. Today, false eyelashes are available in a wide variety of styles, sizes and types. The big news is that nearly every haute couture makeup artist places heavy accent on the eyes. Dark, smoky eyes with a thick fringe of lashes add just the right style of nuance and are increasingly becoming a popular look. 

There are 3 main types of false eyelashes: Strip lashes, individual flare lashes, and individual single lashes. Before purchasing and using false eyelashes it's important to know the differences in the options available. 

Strip Lashes

The most common type beginners seek out is strip lashes. Strip lashes from brands such as Velour and Ardell come in many styles to create different looks and are made from a variety of materials. Velour false eyelashes are one of the highest quality lashes on the market and are made from 100% mink. Other brands may use synthetics like plastic and silk, or use human hair. The style and color you choose will depend on your personal preference, budget and the expected look you want. Strip lashes are versatile and can be trimmed to custom fit your eyes or to achieve a specific length. Most beginners will need a few practice trials before perfecting the skill so it’s always best to not trim off too much too soon. 


Individual Flare Lashes

Individual flare lashes are more commonly used by makeup artists, and are applied individually instead of all at once like strip lashes. They are a big help in increasing lash fullness and to fill in sparse areas. Flare lashes typically come in 3 different lengths and are great because the person applying them has a lot more control on how the end result will look. Layer them for a more voluminous look or to make a statement, or add just a few around the outer area of the eye to create flared lashes.


Individual Single Lashes 

The biggest difference between individual single lashes and the first 2 types mentioned is that single lashes are mostly used for eyelash extensions and are more permanent. Strip lashes and flare lashes are made for temporary wear. Single lashes are also usually applied by a professional in a salon, due to the amount of time and expertise needed to apply them correctly. Like flare lashes, they may be used to fill in sparse areas or make lashes more full.

Read more

  • 0 Comments


Eyebrows are one of the most precious features on our face. Paying attention to the shape of our brows is crucial, only because of how they frame our face and features. The decade has increased demand for intentionally bushy, yet somehow still clean-looking eyebrows. (If you've found yourself down a YouTube rabbit hole trying to master this art, you're not alone.)


The trick that most people don't realize that can make a significant difference in eyebrows is using concealer to highlight them. Concealer isn't just to cover unwanted blemishes or dark circles under the eyes—it helps shape and lifts brows, usually with only one application. The more defined and lifted your brows look, the more bright and rested you'll appear. Keep scrolling for our tips on how to use concealer for perfectly shaped eyebrows.


Step 1: Find Your Shade

As a general rule of thumb, concealer should be a shade lighter than your natural skin tone, as it needs to blend into your skin while still serving as a highlight. Finding the right concealer shade for you will ultimately result in fresh-looking makeup without having to put in too much effort.

To find your concealer shade, test out a few on your skin until you find the one that brightens yet appears the most natural, avoiding any shade that looks obvious. It's also important to experiment with the texture of the concealer and level of coverage. Knowing if you prefer sheer, medium, or full coverage is vital when choosing a concealer you're going to wear every day.

Step 2: Get Your Brows Shaped
When your eyebrows are in their best shape, everything from shadow to concealer looks that much better. Shaping your brows will help with stray hairs (to create cleaner lines and a smoother surface for concealer application), and if you have waxing or threading done regularly, they should maintain their shape well. It's always important to pay attention to your arch, as this is a crucial focal point for your brows. If you have light-colored hair that doesn't show, you can always have your brows tinted to enhance the color. 

If you find your eyebrow hair is too long, you can always trim it down using a small pair of scissors.

Step 3: Fill Them In

Eyebrow pencils, pomade, gels... you name it, these are all products you can use to fill in areas that are sparse and create your brow shape. Focus on the shape of your arch first, making sure it's defined and natural. When you're done filling in your brows, brush a brow gel through them to make sure hairs are all pointing in the right direction. Brushing brows upward will help create that coveted feathery look, as well as lift the overall appearance of your eyes (making you look more awake). If you find your eyebrows are sparse, there are a few things you can do to help revive hair growth. 
I'm lightly filling my eyebrows in with Lime Crime Bushy Brow Pen .

Read more

  • 0 Comments


Are you constantly trying to pump volume into your flat, thin hair? We know it’s hard! While other girls have it easy with their naturally thick mane, you have to put in some extra effort to make your limp hair look fuller and dense. Having said that, are you sure you are not ruining your thin hair by making these sloppy hair care mistakes? Take a look at 5 common mistakes you shouldn’t be making, but you probably are!


Brushing wet hair 


Wet hair is brittle and weak and nobody, even those with healthy and thick hair, should brush hair when it is still soaking wet. It is worse for those who already have thin hair. It can cause breakage and even harm the health of your hair. Let your hair air-dry and use your fingers to detangle and then brush with a wide toothed comb.


Overusing hair products


Yes, you do need extra hair products and a few more minutes of blow drying to get the faux volume in your hair. But, using too much heat styling and hair products can affect your hair health. Keep product usage to a minimum and use medium heat only when necessary.


Not getting a trim often


You may love to keep your hair long, but it is better to get a haircut on a regular basis. It helps keep your hair healthy and gets rid of the dry ends that make your hair look even thinner and scanty. Also, shorter hair has more bounce to it and the ends look crisper which gives an illusion of a fuller mane.

Read more

  • 0 Comments


We at BeBe are major fans of multitasking makeup products. While all of us have used our good ol’ lipstick in multiple ways and even created a full face of monochrome makeup look with it, did you know that an eyeshadow palette is equally versatile too?

Yes, really! Investing in an eyeshadow palette like the Lakmé Absolute Spotlight Eye Shadow Palette – Smokin’ Glam gives you access to a range of matte and glittery shades that you can use in so many different ways. Scroll down to find out how we used this stunning eyeshadow palette from Lakmé in five different ways.

01. As a glitter nail polish
02. As a blush
03. As an eyeliner
04. As a highlighter
05. As a contour

01. As a glitter nail polish


Feel like wearing glitter nail paint but don’t have any handy? Well, simply scrape a little bit of any glitter shadow from this palette and add it to clear nail polish. Mix it thoroughly before painting your nails with it. Who knew creating customised shades would be this simple!

 
02. As a blush


The beautiful peach shade in this eyeshadow palette makes for excellent blush and helps in adding a warm flush of colour to your cheeks. If you have large open pores, stick to the matte shades; otherwise, you can apply any of the glittery shades for an instant pop of colour.

 
03. As an eyeliner

Feel like applying a coloured eyeliner but don’t want to invest in a separate product? Well, the beautiful mix of shades in this eyeshadow palette will come in handy. All the shimmery shades in this palette make for the perfect eyeliners to wear with your ethnic outfits or glam party wear.

Read more


  • 0 Comments


While you may think eye makeup application is a bit of a no-brainer, did you know that changing your technique based on your eye shape can make a world of difference? Just like jeans meant for your body type can offer a more flattering look, the same is true when it comes to coordinating your eye makeup with your eye shape. Sure, you could layer on eye shadow and eyeliner in the most obvious way, but when you know your eye shape and apply accordingly, they’ll pop like never before. Sounds pretty eye-catching, right? To help you perk up your peepers for their best look yet, we’ve created this super-comprehensive guide—soon enough you’ll know your eye shape and how to accent it like a pro!


HOW TO DETERMINE YOUR EYE SHAPE

Before you switch up your eye makeup technique, you’ll need to determine which eye shape you have. How you apply makeup to almond-shaped eyes might differ from how you apply makeup to downturned eyes. Not sure which eye shape you have? Consult the list below.


Almond eyes. Think: oval-shaped eyes with slightly upturned outer corners that look like—you guessed it—almonds. Known for being super-symmetrical, you can think of almond eyes as the universal shape that pairs well with just about everything.


Round eyes. Look in the mirror. What do you see? If you can see your whole iris without any of it being covered up by your top lid then say hello to your big, beautiful round eyes.


Upturned eyes. These are almond eyes with a twist. Instead of having slightly upturned corners, upturned eyes take it up a notch for a more noticeable angle, which makes the lower lid appear larger than the upper.


Downturned eyes. These are the opposite of upturned eyes—meaning the corners drop down for an upper lid that appears larger than the lower.


Monolid eyes. Just think of these as creaseless beauties.


Hooded eyes. Ever wondered why you can’t fully see your crease? When you have hooded eyes, the skin extending from your brow bone sags just a tad to conceal your crease.


Now that you have a better idea of your eye shape, it’s time to learn what you can do to really enhance them. Grab your favorite liquid liner and eye shadow palette and follow along!


THE BEST EYE SHADOW TECHNIQUE FOR YOUR EYE SHAPE

Eye makeup is huge right now and there’s never been a better time to play around with your makeup and enhance the most captivating feature on your face. There’s nothing quite like the right eye shadow technique and a little lid contouring to really accentuate and flatter your eye shape. See below for tips on applying eye shadow to each eye shape, then get to work on highlighting your beautiful eyes!


THE BEST EYE SHADOW FOR ALMOND EYES

You’re one lucky woman! With your slightly lifted, super-symmetrical eyes, just about any shade and style will look fabulous. Don’t know where to start? Try a classic nude smoky eye that uses a medium matte brown on your lid paired with a slightly darker shade blended into your crease. Use the L’Oréal Paris Colour Riche Quads in Cupa Joe to bring this look to life. When fully blended, this look will open up your eyes and accentuate your almond shape.


THE BEST EYE SHADOW FOR ROUND EYES

Contouring your peepers it the key to creating a stunning, defined end look. All you have to do is apply a medium to dark shade over the center of your lid, followed by highlighting your inner and outer corners with a lighter shade. This will draw attention to the center of your eye for an ultra-flattering look. Use the L’Oréal Paris Colour Riche Quads in Army Brat to put a colorful twist on an otherwise simple look.


THE BEST EYE SHADOW FOR UPTURNED EYES

Complement your upturned eyes with the help of a little dark shadow or liner placed on the outer corner of your lower lash line. Next, apply a medium-toned shadow on your lid before topping things off with a subtle highlight on your brow bone—all using the L’Oréal Paris Colour Riche Pocket Palette Eye Shadow in Boudoir Charme. Just don’t be too heavy-handed with your highlight, as you want it to have the same (subtle) effect that light bouncing off your skin naturally creates.


Read more

  • 0 Comments


Face shape is one of those physical features we might not always be actively thinking about, but it contributes to so many parts of our lives. Everything from picking a hairstyle to determining the best makeup technique and even selecting the most flattering sunglasses hinges on this specific anatomical detail. According to Tanuj Nakra, MD, board-certified cosmetic surgeon and co-founder of Avya Skincare, "The shape of our faces is a direct result of our underlying bone structure, which is based on genetics." That being said, the process of identifying your face shape certainly doesn't need to include a trip to the doctor's office.


It’s time to finally demystify the magic of identifying your face shape, and we’re here to help you do it. While we fancy ourselves quite knowledgable on a host of beauty topics, we knew an A team of cosmetic dermatologists and surgeons would be the perfect resource for breaking down the specific steps for pinpointing your face shape quickly and accurately. So we called in our favorite MDs to help us understand the ins and outs of facial structure.


Keep scrolling to peep our handy face-shape chart and the three best tips for identifying yours, according to our squad of aesthetic experts. Then, read more about your specific face shape.


3 Steps to Identify Your Face Shape (It's Actually So Easy)

Face shape is one of those physical features we might not always be actively thinking about, but it contributes to so many parts of our lives. Everything from picking a hairstyle to determining the best makeup technique and even selecting the most flattering sunglasses hinges on this specific anatomical detail. According to Tanuj Nakra, MD, board-certified cosmetic surgeon and co-founder of Avya Skincare, "The shape of our faces is a direct result of our underlying bone structure, which is based on genetics." That being said, the process of identifying your face shape certainly doesn't need to include a trip to the doctor's office.


It’s time to finally demystify the magic of identifying your face shape, and we’re here to help you do it. While we fancy ourselves quite knowledgable on a host of beauty topics, we knew an A team of cosmetic dermatologists and surgeons would be the perfect resource for breaking down the specific steps for pinpointing your face shape quickly and accurately. So we called in our favorite MDs to help us understand the ins and outs of facial structure.

Keep scrolling to peep our handy face-shape chart and the three best tips for identifying yours, according to our squad of aesthetic experts. Then, read more about your specific face shape.


What is My Face Shape?

Tip #1: Trace your face.

According to Simon Ourian, MD, founder of Epione Beverly Hills, making an outline of your face in the mirror can point you in the right direction of determining your face shape. "Stand in front of a mirror and trace the outline of your face using lipstick or anything else removable," he instructs. Step back, and you can use the below guidelines to identify your face shape.  


Tip #2: Consider the relative prominence of your cheekbones and jawbone.

As Nakra puts it, "The cheekbones (maxilla) and jawbone shape (mandible) have a major impact on facial shape." He says that some other factors also contribute, such as the shape of the forehead and nose, the location of the eyes and mouth, and the prominence of facial fat pads, but the cheeks and jaw tell most of the story. "First, identify the most prominent point and location of each cheekbone.  Next, determine the shape and prominence of the jawbone. Comparing these two bony landmarks can help determine the face shape," he instructs.


Tip #3: Think outside the box.

Obviously, our faces are not going to be exact replicas of geometric shapes we learned about in school. So it's best to be less rigid with our expectations of conforming to an exact shape and leave room for other contributing factors. "The overall face shape takes into account the relative prominence of features and changes with age and weight," says Anita Patel, MD, founder of her eponymous cosmetic surgery practice in Beverly Hills. "If looking at a triangle, a youthful face has the apex at the bottom, whereas an aged look has the triangle flipped upside down, with the base at the bottom," she adds.

In addition, Ourian recommends thinking about how we apply our makeup to help make us more cognizant of our facial structure. "As a rule of thumb, consider how and why you contour and highlight certain areas of the face using bronzer, blush, and highlighter. This bone structure you exaggerate shadows and highlights, contributing to your face shape," he says. 

Read more

  • 0 Comments


Knowing your eye shape will help you apply makeup effectively. Making the best of your eye shape is as important as your color choices. The placement of your shadows and liners can make or break your eye shadow look.


Eye contouring is using makeup to change or enhance your natural eye shape and, if you have downturned, monolid, or small eyes, this will be your new favorite beauty hack. You’ll learn how to contour your eyes and look more fabulous!


Check out our infographic below:


Almond Eyes – This is considered to be the most balanced of eye shape, meaning the lid, socket and brow bone are proportioned. With this shape, you can wear any style and play with placement of colors.


Wide Set Eyes – As a general rule, the width between your eyes should be approximately one eye – if it’s more, you have wide set eyes. When it comes color placement, to balance the face, apply a medium tone to the inner corner and work out across the lid, which will make the eyes appear to be closer together. If you put a lighter color in the inner corner of the eye, you will end up making it appear that your eyes are even wider apart.


Close Set Eyes – As mentioned above, using the “one eye apart” rule, if you have less than an “eye width” you have close set eyes. In this case, if you add dark color to the inner eye, your will make your eyes look even closer together. You need to add light colors to the inner eye and darker to the outer eye – this will give the appearance of a balanced eye shape.


Round Eyes – This, has a very similar shape to almond eyes, but the eyeball itself is more pronounced. For this shape, you can do anything on the top (lid, crease etc.) but I would avoid using any liner on the bottom of the eye as this tends to exaggerate the roundness.


Downturned Eyes – This shape tends to have a “droopy” look to the end – to pull the eye up, make sure any liner or color you use is drawn upward from the outer corner of the eye. You can do this with the tip of a triangle sponge – after application, take the sponge and from the outer corner, just swoop upward and you will see an instant lift to the eye.


Upturned Eyes – This shape is obviously the opposite of the downturned eye, so for this shape, avoid liner that sweeps up as that will exaggerate the upturn. Rounding out and blending the outer corner will give a more balanced look. Use dark eyeshadow on the lower outer corner of the eyes. That will instantly lower down the eyes and help balance out the shape. On the lids, use a medium eyeshadow. You can use the same eyeshadow along your lower lash line. Don’t forget to highlight the brow bone.


Prominent Eyes – Some refer to this shape as “bulging” but really, it is simply that the lid is pronounced with a rather deep socket. Applying light to the lid and dark in the crease will only enhance the shape – remember light brings forward and dark recedes. For this shape, you will love your results if you apply a medium to dark tone on the lid only, with a lighter tone in the crease.


Big Eyes – This shape works best with medium tones swept around the entire eye – follow around the lash line both above and below and add a bit of dark shadow to the outer corners for a smokey look.


Deep Set – This shape is not like prominent shapes eyes – with this shape, you have a deep socket with a balanced lid – but the principle of application is the same. You want to avoid using dark colors in the crease as this will only add the deepness of your socket. Instead, add medium tones from lid into crease.


Small Eyes – With this shape, I avoid lining the entire eye with a dark liner or color as this only closes the eye more. Light to medium color around the entire eye, and line only the top lid.


Hooded Eyes – This is when the skin of the crease falls over the lid, covering most of it. I have this shape. I find most people try to minimize the “hood” by applying a dark color in the crease – BUT this doesn’t really work as hooded eyes don’t have a pronounced crease. The balance of your eyes and face will look best if you apply a darker neutral color on the lid to within ½ inch to the brow and smudge up. Then apply highlight on the frontal bone. Adding a bit of a highlight to the inner corner will open the eye. Then lots of mascara! It’s also a good idea to keep your brows well-groomed all the time so that you’ll have enough space to work with.


Read more

  • 0 Comments


Confession: I hate taking off mascara more than I hate most things. The sticky, messy task has NEVER been worth it for me—until the Thrive mascara entered the picture.

For me, wearing makeup has always been about covering up my skin. I used eye and lip makeup to occasionally accentuate other features, but my face was always the main attraction. Last year, however, I successfully completed a bout of isotretinoin (a super strong acne medication)—and I now finally feel comfortable and confident enough in my appearance to experiment with my makeup.

That being said, it was the perfect time to embrace my lashes and find a mascara that did everything I needed it to. Here, I share my full, unfiltered thoughts on one of the most viral makeup products of our generation.

About the Mascara

The award-winning Liquid Lash Extensions Mascara from Thrive Causemetics makes a bold claim: to create the look of lash extensions, without the ACTUAL lash extensions. It also claims to enhance your own natural lash health, all in an easy-to-remove formula that leaves you free of flakes, smudges, or clumps.

The product comes in both black and brown/black, costs $24 per tube, and is vegan. Added bonus: for every purchase, Thrive donates to a woman in need.


My Experience


Like I said, I’m a lash purist. My natural lashes are pretty short and straight, but I’ve never loved caking on product just to essentially scrape it off 12 hours later. (Plus, I have allergies, so I’m constantly rubbing and scratching my eyes.) 


In the past, my favorite mascara has always been the Milk Makeup Kush Mascara. It doesn’t provide much by way of length, but it’s highly volumizing and holds a curl well. Unfortunately, it’s a bit flaky, but it’s easy to remove.


I heard about the wonders of the Thrive mascara through a few friends and other publications (and through my mom, who was desperate to try it herself). Though somewhat loyal to the Milk variation, I decided to give it a purchase (and my mom bought one too!).

Read more

  • 0 Comments


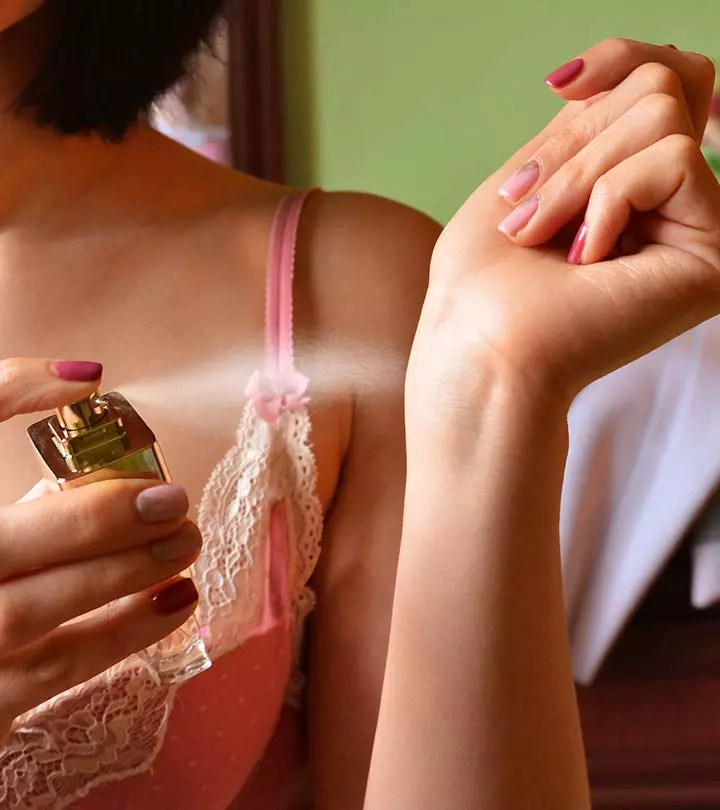
As summer approaches, we’re all preparing for it. Bring out those tank tops, shorts, and sun dresses! It’s time to put away those huge jackets. Phew! Thank goodness that’s over. Come summer, and we change our entire look, so don’t you think we should as well have a few signature scents for this warm season?

Well, look no further because here is a list of the highly recommended perfumes for the summer that you’d totally want to spritz all over your body!

Best Perfumes For Summer

1. Jo Malone Jo Loves Mandrine


It comes as no surprise that Jo Malone finds its place in this list. They have some of the best perfumes available in the market. This cologne has a citrus fragrance that will instantly remind you of the warmth of somewhere lovely.

2. Derek Lam 10 Crosby Silent St. Eau De Parfum


Derek Lam had a very specific image in mind. He pictured a girl walking down the street, looking ever so confident and in her element. He wanted to capture that feeling in a perfume, which is exactly what this perfume is. It has a floral and fresh scent that has a hint of pure musk. Perfect for a day out in the sun!

Read more

  • 0 Comments


There’s a reason why we love the princesses of our childhood—and it’s not solely because of their pretty ball gowns and epic love stories. Nope, it’s their big doe eyes that make it impossible to look away. There’s just something about the appearance of big eyes that makes someone’s overall beauty look seem more youthful. If your eyes don’t look quite as large as you’d like, that’s totally alright. That’s exactly what makeup, and eye makeup, in particular, is here to help you achieve. Here, learn how to make your eyes look bigger via 10 easy tips and tricks.


TIP #1: USE A BROWN OR COLORED EYELINER

Black might be your go-to color when it comes to eyeliner, but using a brown or colored eyeliner can also help make your eyes appear bigger and brighter. For enlarging the appearance of your eyes, choose a colored liner that mimics the natural color of your eyes! If you have beautiful baby blues, for example, reach for the L’Oréal Paris Infallible Pro-Last Waterproof, Up to 24HR Pencil Eyeliner in Cobalt Blue. For all our green-eyed gals, use the same pencil eyeliner in Forest Green.


TIP #2: HIGHLIGHT WITH EYESHADOW

Similar to how you highlight your face, you want to use eye shadow to highlight certain parts of your eyes in order to give them a larger look. Select a white or light ivory eye shadow, like the L’Oréal Paris Colour Riche Monos Eyeshadow in Paris Beach. Apply the eye shadow to the inner corner of your eye, below the arch of your eyebrows, and on the center of your eyelid to leave your eyes appearing more open and awake.

TIP # #3: CONTOUR, TOO

Just as highlighting is important, contouring your eyes is a must to fake a larger appearance. Use a darker brown shade, like the L’Oréal Paris Infallible 24 HR Eye Shadow in Bronzed Taupe, to define your eyes. Apply the shadow just slightly above the crease of your eye to create the illusion that your eyes are larger. Drag the shadow upward and outward for a brown smoky eye that will widen the appearance of your eyes. Take the same dark brown eye shadow and apply it along your lower lash line from the outer corner to the middle of your eye.

TIP #4: DON’T OVERLINE

Sure, in middle school and high school it might have seemed like a good idea to completely surround your eyes with dark eyeliner, but now that you’re an adult, it’s time to update your makeup technique. That’s because when you surround your eyes with dark eyeliner, it can actually make them look smaller. Instead, draw a simple thin line on either your top or bottom lash line—not both—using a liquid eyeliner with a precise tip, like the L’Oréal Paris Voluminous Lash Paradise Liquid Eyeliner. If you’ve lined your upper lash line and still feel like you need more of an accent on your lower, use a medium-toned brown eyeshadow instead of applying more eyeliner. Apply a super light dusting of shadow using a thin, tapered eye shadow brush.

Read more


  • 0 Comments


There is a reason why makeup is considered an art form that can never be fully mastered. You can always develop a new technique or learn a new skill that enhances your facial features. For the uninitiated, contouring might be the only way you might know how to change the shape of your face, but there are easier ways to do so. Take blush, for instance. Based on the placement, you can either make your face appear rounded or longer — it all depends on the application technique. Intrigued? Check out this simple guide below on how to apply your blush to enhance the shape of your face.


  1. Lifted look- Applying your blush on the side of your cheekbones, a little under the outer corner of the eye and blending upwards and outwards will give your face a lifted effect.
  2. Shorten the face - To make a long face appear shorter, you can simply place the blush on the centre of your face and blend it out with a fluffy blush.
  3. Enhance cheekbones - Applying the blush on your cheekbones above the hollow (not beneath) can make your cheekbones look more prominent.
  4. Add fullness - Just like how placing the blush under the cheekbones and on the side gives you face definition, placing it on the inside and closer to your mouth can make your face look fuller.
  5. Sunkissed look - To fake a sunkissed look, all you need to do is sweep some blush from the outer corner of one eye to the other - going over the nose. It might sound crazy, but believe us when we say that it might just become your favourite way of wearing blush.
  6. Pro tip: To prevent a makeup faux pas, we suggest using a buildable powder blush. One of our favourite picks is the Lakmé 9 to 5 Pure Rouge Blusher - Pretty Pink. It gives your skin just the right amount of warmth and colour payoff, read: no clown faces.


Image courtesy: @ananyapanday

Read more


  • 0 Comments


Full lips are certainly something to be desired, but not everyone is naturally given the volume in their pout to obtain this look on a daily basis. While we've definitely seen this trend all over Instagram (cue Kylie Jenner), it can certainly be intimidating at first when trying to pull this look off ourselves. Seeing as fillers and injectables are a path many choose to change the shape of their natural lips, these options aren't always available or affordable to all. Learning how to shape your lips and slightly over-draw with lipliner is key when wanting to give yourself more fullness without spending your money on expensive treatments.

Keep scrolling for a complete and easy (we promise) guide on how to overdraw your lips without it looking obvious—you'll be all the wiser and no one will be able to tell!

Assess Your Lip Shape

When wanting to overdraw your lip shape, this first step is essential. Since everyone has differently shaped lips, knowing what kind of lip shape you have and where you want to add fullness will help you immensely when deciding where to begin. For instance, if you want more volume in your upper lip versus your bottom, keep that in mind before starting to draw out your lines. You'll want to keep the focus on your upper lip more, but also have the bottom half of your lips look consistent. The more you become comfortable with your own lip shape, the easier this will become over time.

Choose Your Color

Whether you're wanting to do a nude lip or something more bold, having a lipliner and lipstick that match is essential when pulling this look off. When you first start practicing, you might want to choose a more neutral color until you get comfortable with drawing your shape. When it comes to the lipliner and lipstick, be sure the colors compliment each other and aren't too drastic. (For instance, you don't want an obvious difference in color between your lipliner and lipstick.) For this tutorial, I've chosen to use a pinkish nude tone.


Fill In The Outer Corners


When starting out, most people tend to focus on the cupid's bow when beginning to line their lips, but where most mistakes are made is when you try to extend that line outward to the corners. If you start by lining the outer corners first, you make less mistakes from the beginning with getting the shape right. As you can see here, I've applied liner to the outer corners of my mouth just above my natural lip line so it looks fuller but not too full. When you start by lightly drawing liner over the corners first, filling in the top and bottom part of the lips is much easier. This allows for a more natural looking contour.


Make an X at The Cupids Bow


After you've filled in the outer edges and corners, make the shape of an X at the cupids bow to ensure that the top portion of your lip on each side looks even. Extend the X down on each side—it doesn't need to be perfect at all. The shape of the X is what helps you make each side of your top lip more even when you continue the line downward, as you see here in the photo. This is a better way to create a fuller shape rather than starting to draw a line, then stopping, then continuing with the line again.

Read more

  • 0 Comments


Ah, eyeliner. We love you so, but must you be so difficult? We give you all our time and patience, and yet you still rebel like an angry teen, wobbling and smudging and streaking to no end. To which we say enough. If we feel this way, we can only imagine what newbies must feel—which is why we’re taking things back to basics today and sharing 10 game-changing tips for the eyeliner inept (or just those who've never given it a chance). These are the very tips that have helped us overcome our own eyeliner frustrations and greatly improved our tracing, retracing, and flicking. 

Scary pencil of doom Eyeliner ready? Let’s get started.


Keep scrolling for 10 game-changing eyeliner tips for beginners.


Pick Pencil


If you’re new to the eyeliner game, you might be overwhelmed by all your options. Pencil, gel, liquid, felt… The list goes on. We’ll give you our best advice: Pick pencil. Why? Because it’s the easiest and a great starting point for eyeliner beginners. A smooth pencil glides on easily, doesn’t tug, and is more forgiving with shaky hands than liquid or gel. But if you must intensify your line…


Layer Your Liners


Crave the inky-black, perfectly flicked look of liquid liner but lack the technique for a precise line?


Connect the DashesIf your lid always seems to tug when you apply liner, leaving you a panda-eyed mess, you might want to try a simpler route. Namely, drawing three dashes along your eye, then connecting them. You can blend the line together using an angled eyeliner brush, or simply clean up any unevenness with a cotton swab dipped in makeup remover (or lotion). 

Read more
  • 0 Comments
Older Posts Home

About Cult Cutter

a


Cult Cutter

One-Stop destination

for

Beauty • Wellness • Styling


Follow Us

  • Visit Website
  • Instagram
  • Facebook

recent posts

Labels

Beauty Styling Wellness

instagram

© Copyright - Cult Cutter 2020

Template Created By : ThemeXpose Distributed BY: Blogger Templates

Back to top