Beauty ,Wellness, Styling Blogs | Cult Cutter Blogs

  • Beauty
  • Wellness
  • Styling
  • Visit Website


Boar brush


This is one brush that every girl with fine, frizzy and limp hair needs to invest in. Made using real boar hair, this hairbrush boasts of a number of benefits. Since this brush has extremely soft and flexible bristles, it does not hurt your scalp, preventing any sort of damage. Additionally, brushing your hair with a boar brush helps seal the cuticles (the same thing that a cold water rinse does) and lends your hair incredible shine and movement.


Porcupine brush


Don’t let the name mislead you; porcupine brushes are not harsh on your scalp and won’t cause any sort of tearing or damage. This hairbrush is made with a combination of boar bristles and nylon bristles; the nylon bristles are slightly extended for better results. This kind of brush provides thin hair with a gentle, yet firm hold and adds some movement to flat hair.


Cushion brush


If you are looking for a styling hairbrush for fine and thin hair, then you should consider giving cushion brush a try. This brush typically features synthetic or natural bristles on a rubber base to eliminate static that arises from brushing the hair.

Read more

  • 0 Comments


Eyebrow trends have been constantly transforming with every passing year. From the thin, rounded brows of the 1930s to the barely-there brows of the 2000s, we’ve seen it all. While keeping up with eyebrow trends may be essential, it is also important to allow the brows to grow.

If you’re someone with naturally thin brows, we want you to know that it’s completely normal. But if it hinders your confidence level, we are here to help you with some easy hacks to make your brows look thicker. Whether you wish to keep it arched like Lea Michele or bushy like Cara Delevingne, the key is to achieve fuller-looking eyebrows. With well-grown eyebrows, you can easily catch up on the latest brow trends.

Through this article, we intend to enlighten you about 10 ways to get thicker eyebrows. Keep reading to brows(e) through some of the most popular ways of making your eyebrows look fuller.

1. Avoid Over-plucking
The trend of pencil-thin eyebrows took over the fashion industry between the late 90s and early 2000s. If you witnessed this, chances are you’ve spent much time at a salon getting your eyebrows plucked. It was a time everyone was seen flaunting thin eyebrows. As a result, those with naturally thick eyebrows experienced thinning of their eyebrows over the years.

The pressure applied by tweezers and threading tools on the hair follicles of the brows may cause long-term thinning effects. Paired with other factors like stress and underlying ailments, eyebrows may take a while to grow back to their original form. For those who intend to get their eyebrows plucked in the future, we recommend doing it less frequently.
If you’ve been in the habit of over-plucking your eyebrows, we recommend getting rid of this habit to make them grow naturally thick. Bidding goodbye to the tweezer for a few months will help your brows gain their natural thickness back.

2. Balanced diet
There is a significant relationship between nutrition and the thickness of your hair. A diet that lacks the necessary nutrition for healthy hair growth will result in thinner hair on the scalp, brows, and lashes.

Eating a well-balanced diet rich in vitamins, minerals, and essential fatty acids may help regain eyebrow thickness. Following a diet that is rich in iron, protein, zinc, vitamin A, and omega-3-fatty acids may help in regrowth. When the body is supplied with healthy food, the nutrients end up giving you healthy hair, skin, and nails.

Consume as many fresh vegetables and fruits as possible. Munch on fruits like lemon, orange, papaya because they are a good source of vitamin C. Vitamin C intake may help those suffering from iron deficiency and in turn reduce hair loss (1).

Also Read – White Hairs in Eyebrows – The Reasons and Remedies

3. Coconut oil
For centuries, coconut oil has been raved about for its ability to promote hair growth. A study done in 2003 determined that coconut oil has a strong impact on reducing protein loss in hair .

The moisturizing abilities of coconut oil nourish, protect, and hydrate the eyebrows. When applied to the eyebrows, the antifungal and antibacterial properties of coconut oil prevent the possibility of infections around the eyes.

Massaging coconut oil on the roots of your eyebrows regularly may boost blood circulation thereby allowing the essential nutrients to reach the hair follicles of your brows. Doing this consistently for a few months may give your noticeably thicker eyebrows.

Read more

  • 0 Comments


Oh the horror of that moment when you are having a good day and someone tells you, you look tired! Your dark circles can make you look exhausted even on the best of days. Obviously then, you need to do something about them, panda eyes.


Follow these steps to get rid of those dark circles and add life to your makeup look...


Prep up:


The first step in makeup is prepping your skin. Always start by hydrating your skin. If you want to cover your dark circles or hyperpigmentation, make sure your skin is ready for all the products you are going to layer it with to cover the darkness. Use a hydrating face mask or under eye mask before makeup. If you don’t have an under-eye mask, use some deep moisturising serum or moisturiser under and around your eyes.


If you are trying to cover pigmentation around your mouth, use a little bit of eye shadow primer around your mouth as it works well to hold onto any product placed on top.


Read more

  • 0 Comments


This sensitive skin needs care too.

You may understand how the skin on your face and body can be dry, but do you ever find yourself looking in the mirror and asking, “Why are my eyelids dry?” If so, you may be wondering how your skincare routine might be able to help. After all, you can’t exactly layer a facial moisturizer over such a sensitive spot. Fortunately, there are products to help keep dry skin on your eyelids at bay. Read on to learn what can cause dry skin on your eyelids, as well as products and tips for how to treat dry eyelids.


WHY YOUR EYELIDS MAY BE DRY

As with dry skin on the rest of your body, dry eyelids can stem from external factors, some of which you may be familiar with, like the weather and hot water. The American Academy of Dermatology (AAD) states that the skin on your eyelids is the thinnest in your body, and can get irritated easily. If you’re noticing dry skin appearing on your eyelids, chances are you may need to keep them moisturized. Follow these tips and product recommendations to help alleviate this uncomfortable skincare concern.


TIP #1. PETROLEUM JELLY

If you notice you have dry eyelids, you may want to very carefully swipe a bit of petroleum jelly onto the skin (avoiding your eyes). Specifically, if your eyelids are dry and flaky, the AAD recommends applying a small amount of petroleum jelly for moisture and protection.


TIP #2. STOCK UP ON EYE CREAM

Of course, eye cream will be your best friend when it comes to caring for dry eyelids. Look for options that have ultra-hydrating formulas to give your parched skin the moisture it craves, like the L’Oréal Paris Age Perfect Hydra-Nutrition Manuka Honey Eye Gel. This eye cream with manuka honey and nurturing oils helps cushion mature, very dry skin with nourishing moisture. The hydrating, cooling formula works together with the de-puffing rollerball wand to care for the delicate eye area. As a result, puffy bags appear reduced, dark circles appear brighter, and eyes look more youthful.

Read more


  • 0 Comments


Incorporating a facial massage tool into your regular beauty routine might just be the fast track to flawless skin – and now, you don't need to be a professional to own one.


So, what exactly are the benefits of these strange-looking gadgets? Generally speaking, using a tool to massage your face can alleviate tension in overworked muscles, (jaw-clenchers, we're talking to you), which not only feels heavenly but can also tone and lift your complexion.


By kicking your lymph system into gear, a jade roller or gua sha stone (more on that later), can shift toxins and blockages, meaning those long-lost cheekbones will soon reappear, higher and sharper than ever. Alternatively, pick a tool enhanced with vibrational technology, and it'll aid absorption of all those lovingly applied serums and creams, ensuring you see optimal benefits from your products.


According to expert facialist Sarah Chapman, working frequent massage sessions into your skincare routine will deliver welcome cumulative results. 'Regular use brightens, tightens, drains toxins and reduces puffiness by boosting the supply of vital nutrients and oxygen to your skin, giving you that immediate, fresh glow,' she says.


If all that hasn't got you convinced, consider the soul-soothing benefits too. These little tools are packed with stress-busting power – and we all need a little of that right now. Try rolling one over just-cleansed skin after an anxious day, and you'll soon see what we mean.


From holistic heroes Herbivore to skin-tech innovators Foreo – and, of course, Chapman's own cult contraption – all manner of beauty brands are now jumping on board, crafting tools from jade and rose quartz or using sonic technology to bring salon-standard results to you, at home.


Here, we've rounded up the best face massage tools, jade rollers and vibrating wands to start practising with now, along with exactly how to use them, and the results you can expect.


The best facial massage tools for your Friday-night facial


1. Black Obsidian Facial Roller – 


This black obsidian face roller not only looks incredibly chic, but is believed to eliminate psychic smog too. Failing that, the mind-soothing rolling motion is sure to set your chakras straight. 

Read more

  • 0 Comments


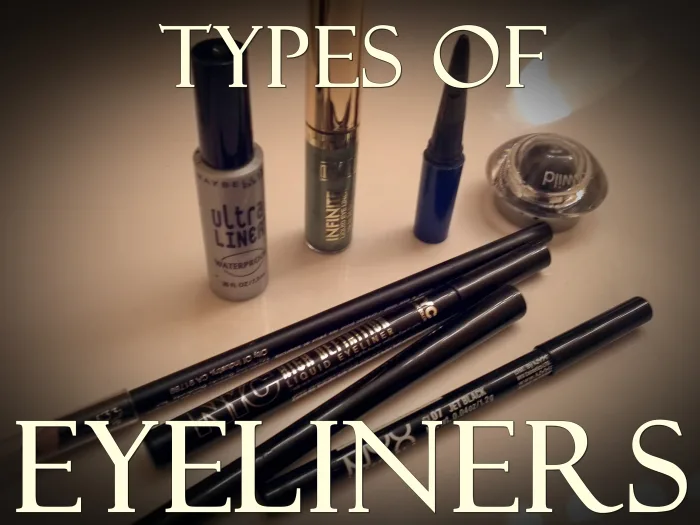
When to Use Which Eyeliner

There are many varieties of eyeliner on the market today. Unfortunately for us, there is no omnipotent eyeliner out there, all of them are separated into different categories that are designed for different uses around the eye. These are the ones we see most often in the cosmetic industry.


Most Common Eyeliners in the Cosmetic Industry

  • Liquid eyeliners (brush applicator)
  • Felt-tip eyeliner (also called art liner)
  • Gel or Cream eyeliner
  • Kohl Pencil Eyeliner
  • Kajal Eyeliner
  • Regular pencil eyeliner
  • Mechanical twist-up eyeliner
  • Eyeshadow (used as eyeliner)

If you are concerned about any ingredients you see on an eyeliner, please visit the FDA's website for an approved list of chemicals.


Read more

  • 0 Comments


Heading to the nail salon or taking time for a DIY manicure is always a treat, but with so many shaping options, it can be tricky to choose. Should you do almond? Try square? Squoval? We asked nail professionals for the scoop on what nail shapes are in style and most popular so you can find the best one for your hands.


First, to find the best nail shape to flatter your hands and fingers, first check your cuticles, advises Fleury Rose, a celebrity nail artist in Brooklyn, New York. If you have an oval cuticle shape, she recommends matching it with an oval nail shape.


Here, our guide to the different nail tip shapes, including options for short, long, natural, and acrylic nails, whether you're looking for something classy, simple, fun, or a strong statement shape so you know what to ask for at the salon or create yourself for a perfect manicure:


1. Round-Shaped Nails

This simple shape is perfect for short nails (even nail biters!), extending only slightly past your nail bed and maintaining its natural shape. It's also the most popular nail shape: When they visit the salon, most women opt for this classic silhouette, Rose reveals. This shape is also perfect if you want strong nails, recommends Ava Shamban, M.D., a dermatologist in Los Angeles and author of Heal Your Skin. With this shape, nails are less likely to tear or break, making them healthier.


2. Square-Shaped Nails

If you want a shape other than a natural rounded one that doesn't take a ton of effort to maintain, try a square style with the tip filed flat. You don't need much of a tip to achieve it, so this look is great for shorter nails. If you're concerned with short or chubby fingers, though, Rose says to grow nails out a bit longer: "Short and square is the hardest shape to wear, as it can make hands appear stumpy."
This version of square nails is popular and universally flattering for a reason: It's a little softer than its more angular counterpart, but still looks put-together and is a great canvas for simple nail art.


4. Oval-Shaped Nails

If you have longer nails and desire a more feminine look, try this shape. Oval nails also make your hands look longer, so if you want to slim the appearance of your fingers, this is a good way to go.


Read more

  • 0 Comments


Ever took a pretty white top to the trial room only to find foundation smudges around the collar? Or worn a stunning ruffled shirt and found your foundation smeared all over halfway through the day? We don’t get it, because your foundation is supposed to sit on your face and not smudge all over your clothes. However, we see a lot of women complaining about this therefore here are a few tips that will help...


Invest in a good quality primer


Primer is one of the most underrated products in makeup world. Right from blurring wrinkles to minimising the appearance of pores, a primer is essential to mattify and create a velvety base for long lasting makeup. The Lakmé Absolute Blur Perfect Makeup Primer is a waterproof formula that stays put all through the day.


Use matte foundation


Indian weather demands matte foundation all year long, especially if you have oily skin. Apply thin layers of foundation or use a matte formula that will prevent makeup stains. The Lakmé 9 To 5 Flawless Matte Complexion Foundation is the perfect formula designed for daily wear, it blends effortlessly and gives a flawless finish. 


Do not forget a compact


A matte compact is essential, particularly during summer when your pores re working overtime to produce extra oil. Prevent this by patting some of the Lakmé Sun Expert Ultra Matte SPF 40 Pa+++ Compact it absorbs all the oil from your face and gives an ultra-matte finish.

Read more

  • 0 Comments


You can learn how to naturally lighten hair with some very easy home remedies! You can get started right away by following a few quick steps.

How Lemon Juice Works to Lighten Hair

Lemon juice creates photosensitivity, a heightened reaction to the ultraviolet rays of the sun. Lemon is highly acidic, so when you apply it to your hair, it will change the pH in your hair. The heat from the sun will force the hair cuticles to open, allowing the lemon juice to lift the pigment in your hair. If your hair has been chemically treated, lemon juice probably won't work, depending on the chemicals used to treat your hair. You might get a little lift, but chances are, you won't get any lift.


How to Use Lemon Juice and Water to Lighten Your Hair


First, you should at the very least dilute the lemon juice with water. No matter how tough your hair is, this will help protect it. You can also choose from a number of lemon mixture variations. Always use freshly squeezed lemon juice. You'll need a new/clean small spray bottle.

Supplies

Spray bottle

Towel to protect shoulders, clothing

Short Hair Ingredients

½ cup freshly squeezed lemon juice

½ cup warm water

Long Hair Ingredients

1 cup freshly squeezed lemon juice

1 cup warm water

Instructions

Pour the lemon juice and warm water into the spray bottle and shake to blend.

Wet your hair and towel dry until damp.

Comb your wet hair.

Spray the lemon/water mixture onto your hair, careful not to get it on exposed skin, especially your face.

If you accidentally get it on your skin, immediately wash it off. Don't go into the sunlight with mixture on your skin. The acidity can irritate your skin, cause a rash, or even cause sunburn.

Sit in the sun for a minimum of 30 minutes. If your hair is darker, you can add 10 minutes to your first treatment.

Read more

  • 0 Comments


On the hunt for quick makeup for work tutorials? These makeup tutorials are easy to follow and will cut your morning beauty routine in half… or more!

Quick Makeup for Work Tutorials for Women On-The-Go

Facing the daily doldrums of waking up early in the morning for work and getting your hair and makeup done as fast as you can is something that can get annoying over time… especially if you missed out on decent beauty sleep the night before. But never fear, ladies! We come bearing with makeup for work tutorials that you can create in half the time and, with half the effort too. After these quick makeup for work tutorials, you’ll look more than ready for any work day!
 
1. Lauren Curtis’ Work/Office Tutorial
Lauren Curtis is one of the YouTube vloggers that I really like. Her tutorials are easy-to-follow, and they’re fun to watch too. Her quick makeup for work or office look will take less than 10 minutes. But the finished look will make you look glowing and energized to take on the day! Here are the steps:
 
Step 1: Prime
Start by priming the face. Using primer will help improve your makeup’s lasting power. You’ll need your makeup to stay throughout the day with little to no touch-ups necessary.
 
Step 2: Apply foundation


When it’s work day, it’s best that you go with light to medium coverage as to not make your makeup appear too heavy. I know some women would prefer using a tinted moisturizer or BB cream instead. But if you want more coverage, using foundation is okay as long as you start with little amount and just work your way into the coverage you need.

Read more


  • 0 Comments


Blackheads are the buildup of an over secretion of oil and sebum in the skin, and they essentially block our pores. Eventually, the buildup fills the pores and blackheads become more visible and prominent.


If you suffer with breakouts of blackheads, help is at hand!

DIY Face Masks to Beat Blackheads


1. Milk and Honey Mask


¼ cup milk 2 tablespoons honey Cotton balls or swabs

Mix milk and honey in a bowl. Dip a cotton ball or swab in the mixture and coat your face with it.

If you prefer, you can use thin cotton strips and soak them in the mixture before applying and leaving on your face.

Leave the mask on for 10-15 minutes, then rinse clean with warm water. Do this 1-2 times per week.

Milk contains lactic acid, which is a natural, mild exfoliator. It is easily absorbed into the skin, where it removes dead cells and helps unclog pores. Honey helps your skin to look bright and radiant.

2. Egg White and Lemon Juice


1 egg white 1 tablespoon lemon juice Facial brush

Mix the egg white and lime juice, and apply the mixture over your face with a facial brush, avoiding the eyes and eyebrows.

Leave on for around 10-15 minutes, and you will feel your skin tighten as the mask dries. Wash it off with cool water and follow up with a moisturizer. Do this once a week.

Egg white is a natural astringent, and works well as a toner. It shrinks your pores, and makes your skin look clear and blemish-free. Lemon juice is a natural bleaching agent, and helps to brighten your skin.

3. Cinnamon and Honey

1 tablespoon cinnamon powder 3 tablespoons honey

Mix the cinnamon powder and honey in a bowl until a thick paste forms. Apply the paste to your face, focusing on specific problem areas.

Leave it on for 20 minutes, then wash off with warm water. Do this every other day for two weeks and you will notice a change for the better in your skin.

Read more


  • 0 Comments


Great skin is not just about genetics, but our daily habits. In fact, our skincare routine has a large impact on how we look. But with so many product reviews and opinions, when it comes to our skincare routine, it’s hard to know what to do or how to do it. Whether you are a beginner or a pro skincare aficionado, a basic daily skincare routine will do justice to all skin types. Here is a basic 5-step skincare routine for minimal and effective care:

Step 1 – pH Balancing Face Wash Or Cleanser 


Cleansing your face is the most essential part of any daily skincare routine at home - Day or Night. Our skin comes in contact with environmental pollutants, dirt, and other factors each day that should be gently removed. Wash twice a day, morning and night, to avoid clogged pores, dullness, and acne.

Step 2 – Toner 


While toner is a common part of many basic skincare routines, it is purely optional. Applying toner with clean hands is the most efficient. Just pour a few drops in your palm, then swipe it on. Most formulas can be used morning and night, but you might want to use those with exfoliating acids only at night or every other day.

Step 3 – Serum 


In a simple way, serums are powerful skin allies. Filled with concentrated doses of active ingredients, these elixirs can mitigate a number of issues, from dark spots to wrinkles. “Even if you don’t have any specific issues, everyone still needs a general antioxidant serum in the morning to protect from daily aggressors. And there are a few products that you can use : 

  • Hyaluronic acid
  • Vitamin C 
  • Retinol, vitamin B3, peptides
  • Colloidal sulfur, niacinamide.


Step 4 – Moisturizer 


The second most basic and important step in a daily skincare routine is moisturizing. Be it a nighttime skincare routine or a daytime skincare routine, moisturization is a must. This skincare routine step helps lock in your skin’s natural moisture and keeps it from drying out throughout the day or night. It also helps to lock in the goodness of the serum you just applied. If you have a dry skin type, go for heavy moisturizing creams for intense nourishing. On the other hand, if you have oily skin, you can choose a gel moisturizer for some light hydration. No skin type should emit the step of moisturizer from their skincare routine. No matter how oily, acne-prone or irritated your skin is, there is a suitable moisturizer with nourishing ingredients and texture to help the situation.

Step 5 – Sunscreen 


The last step in the most basic, yet best skincare routine is that of protecting. Apply sunscreen 30 minutes before sun exposure, and reapply at least every two hours. Chemical sunscreens should be applied directly to clean skin, while physical blockers can be applied last in your skin-care regimen, but before makeup is applied.

For knowing top product picks, and want to know more extra skills check out our website which features the best Makeup session and the best product knowledge for the ultimate look.

Why follow: If you want awesome beauty tips as well as a slice of Makeup advice on the side, visit Cult Cutter's Instagram page.


Where to follow: Instagram (@cultcutter), YouTube (@cultcutter), www.cultcutter.com

If You Like this article? Share it with your friends by clicking the icons below!


  • 0 Comments


For us girls, it is hard to imagine our lives without foundation. But the actual quest to find the one foundation that ticks all the boxes is a hassle that most of us would rather avoid.

If there is one thing we have learned over the years, it is that apart from picking the right shade of foundation, it is really important to look for a texture that works for your skin type. Why? Well, choosing the wrong texture not only prevents you from achieving a natural, skin-like finish but could also cause breakouts or dry your skin out.

Since we know that this can get a little confusing, we are here to help you out. We have some awesome tips on how to choose the correct foundation according to your skin type along with our personal recommendations. Oh BTW, you can thank us later!


For dry skin

For people with really dry and flaky skin, it is important that you choose a foundation that also has skincare benefits. This will not only help provide your skin with the right amount of coverage, but it will also moisturize and nourish your skin. We recommend using the Lakme Absolute Argan Oil Serum Foundation With SPF 45. Enriched with Moroccan argan oil, this foundation provides superior coverage, while also moisturizing your skin. This foundation is formulated with SPF 45, which will help prevent sun damage.


For oily skin

When you have oily skin, it is really important to choose your foundation wisely. Picking the wrong formula would totally clog your pores, break you out or even melt off. Always pick a matte finish and long-lasting foundation if you have oily and acne-prone skin. The Lakme 9 To 5 Primer + Matte Perfect Cover Foundation could be perfect for your needs. It boasts of an extensive shade range, settles to a smooth satin finish, and evens out your skin tone beautifully.


Combination skin

To look for a foundation for people with combination skin can prove to be slightly tricky because you have an oily t-zone, while the rest of your face is dry. But applying two different foundations does not make sense. So what is one supposed to do? You can start by applying a hydrating foundation all over your face and then apply a little bit of compact or loose powder over the areas that tend to get oily. You can try the Lakme Absolute White Intense Skin Cover Foundation. Enriched with vitamin B3, this foundation will not only provide serious coverage but also nourish and moisturize your skin.

Sensitive skin

You need to be careful in your choice of foundation if you have sensitive skin because you don’t know what might trigger a reaction. Opt for foundations that are enriched with natural and organic ingredients. This will help protect and nurture your skin. You can opt for the Lakme 9 to 5 Naturale Bi-Phase Foundation Drops. This foundation comes with the goodness of aloe vera and green tea extracts to fight pollution, and protect your skin while delivering a dewy, skin-like finish.

Read more


  • 0 Comments


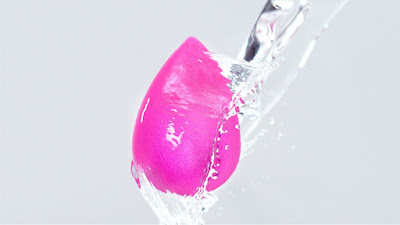
Makeup sponges have been a makeup artist favorite for years and the rest of the world is finally catching on. Using a sponge such as the Beauty Blender leaves a gorgeous, even finish that no other beauty tool can mimic. If you use it incorrectly, however, it can also leave your wallet a little thinner. Here's why you should always wet your makeup sponge before use: 


To Save Product (and Money!)


The number one reason to wet your sponge first is to save on product. In fact, Beauty Blender even put out a post stating that's how it's intended to be used!


If you don't wet your sponge first, it will soak up that expensive product like water. Doesn't that hurt just a little to think about?


Wetting your sponge thoroughly and letting it fully expand has to be your first step. Then, when you apply foundation or other product to it, it'll already be full of water and won't soak up so much product, saving you tons of product and money. 


For Better Performance


When your makeup sponge is damp, it makes product application way easier. It goes on more smoothly and ends up in an even, streak-free finish. 


This is an especially good method if your skin is dry, as there's no brush creating flakes across the surface. Your skin will love the extra moisture!


A word of caution, however: too much water can dilute the product and mess up the texture, so make sure to wring it out well after it's fully expanded. 

Read more


  • 0 Comments


Contouring is a trending way in Beauty that has elevated makeup to a whole other level—and for the better. This makeup technique involves using dark and light colors to enhance or slim down creating the appearance of higher cheekbones and a slimmer nose and chin. but with the right products and equipment, it's easy to do on your own. 

Once you've applied your contouring makeup, remember to blend well for a flawless, natural look. However, contouring does require some practice and knowledge in order to achieve a flawlessly sculpted face. Read and learn a step-by-step guide to creating the How to apply on your face and Join Cult Cutter for more Advance Skills and techniques.


How To Contour In 5 Easy Steps -

Now that you have decided which product is suitable for your face, let's get into how to apply it to your face.


Step 1. Apply Primer and Foundation

Firstly You have to apply moisturizer, primer, and a powder foundation or liquid foundation (depending on preference and skin type) on your face. Apply your foundation using a makeup sponge or a foundation brush like the CULTCUTTER Flat Foundation Brush. If using a powder foundation, you may want to apply a finishing powder or setting powder as well.


Step 2. Contour Your Forehead


If you're new then the easiest way to get started with a powder contour and a contour brush. Begin by lightly dusting contour along the hairline, blending the product smoothly from your head to about one-third of the way to the center of your forehead.

Step 3. Contour Your Cheekbones and Jaw


After the contour around the hairline is well-blended, move down to the hollows of your cheeks. (If you don’t know where this is, suck in your cheekbones) Move the brush along that indentation, toward the center of your face, and then back out.

Once the contour along your cheekbones is blended, finish by applying contour just underneath your jawline from the bottom of your ear to just before the point of your chin. When you put all these steps together they should form a tree-like shape.

Step 4. Contour Your Nose


This is not necessary But Adding a bit of contouring to the sides of the nose is a great extra step to add if you want to boost your contouring routine. You’ll actually want to start this step by applying a highlighter along the bridge of your nose. Then, using your normal contour color, apply two lines of contour on each side of the highlight (along the sides of your nose) and blend until smooth.

Step 5. Finish with Highlighter & Bronzer


As a Last final step, finish by applying a highlighter and applying bronzer. For knowing top product picks, and want to know more extra skills check out our website which features the best session and the best product knowledge for the ultimate look.

If You Like this article? Share it with your friends by clicking the icons below!


  • 0 Comments


Learning how to apply makeup may not be rocket science, but it is not the easiest task either. Especially when so many makeup looks and trends keep cropping up each day. Dewy makeup is one look that has many takers and for all the right reasons. I mean, who doesn’t want skin that looks glowy AF?

You don’t always need the golden-hour light to get pictures with the perfect glow on your face, dewy makeup look can do that for you. Here’s how to ace the dewy makeup look in a few easy steps…

Step 01: Prep and prime


Cleanse your face thoroughly and then apply a moisturiser or face oil depending on your skin type. Allow your skin to absorb it completely before moving on to the next step. To get the perfect base it is essential to first apply a primer, it will give you a smooth canvas for your foundation and other products to glide on. The Lakme Absolute Under Cover Gel Face Primer evens out skin texture for the smoothest skin ever.

 
Step 02: Ace the base


Now that your skin is ready for makeup application, use a concealer to cover dark spots and dark circles then move on to your foundation. An easy trick here is to mix a few drops of face oil with your liquid foundation to get that illuminated look or simply use the Lakme Absolute Argan Oil Serum Foundation which is infused with the goodness of argan oil. Apply the base using a damp makeup sponge for the perfect glow.

Read more


  • 0 Comments
Older Posts Home

About Cult Cutter

a


Cult Cutter

One-Stop destination

for

Beauty • Wellness • Styling


Follow Us

  • Visit Website
  • Instagram
  • Facebook

recent posts

Labels

Beauty Styling Wellness

instagram

© Copyright - Cult Cutter 2020

Template Created By : ThemeXpose Distributed BY: Blogger Templates

Back to top