Beauty ,Wellness, Styling Blogs | Cult Cutter Blogs

  • Beauty
  • Wellness
  • Styling
  • Visit Website


Boar brush


This is one brush that every girl with fine, frizzy and limp hair needs to invest in. Made using real boar hair, this hairbrush boasts of a number of benefits. Since this brush has extremely soft and flexible bristles, it does not hurt your scalp, preventing any sort of damage. Additionally, brushing your hair with a boar brush helps seal the cuticles (the same thing that a cold water rinse does) and lends your hair incredible shine and movement.


Porcupine brush


Don’t let the name mislead you; porcupine brushes are not harsh on your scalp and won’t cause any sort of tearing or damage. This hairbrush is made with a combination of boar bristles and nylon bristles; the nylon bristles are slightly extended for better results. This kind of brush provides thin hair with a gentle, yet firm hold and adds some movement to flat hair.


Cushion brush


If you are looking for a styling hairbrush for fine and thin hair, then you should consider giving cushion brush a try. This brush typically features synthetic or natural bristles on a rubber base to eliminate static that arises from brushing the hair.

Read more

  • 0 Comments


This sensitive skin needs care too.

You may understand how the skin on your face and body can be dry, but do you ever find yourself looking in the mirror and asking, “Why are my eyelids dry?” If so, you may be wondering how your skincare routine might be able to help. After all, you can’t exactly layer a facial moisturizer over such a sensitive spot. Fortunately, there are products to help keep dry skin on your eyelids at bay. Read on to learn what can cause dry skin on your eyelids, as well as products and tips for how to treat dry eyelids.


WHY YOUR EYELIDS MAY BE DRY

As with dry skin on the rest of your body, dry eyelids can stem from external factors, some of which you may be familiar with, like the weather and hot water. The American Academy of Dermatology (AAD) states that the skin on your eyelids is the thinnest in your body, and can get irritated easily. If you’re noticing dry skin appearing on your eyelids, chances are you may need to keep them moisturized. Follow these tips and product recommendations to help alleviate this uncomfortable skincare concern.


TIP #1. PETROLEUM JELLY

If you notice you have dry eyelids, you may want to very carefully swipe a bit of petroleum jelly onto the skin (avoiding your eyes). Specifically, if your eyelids are dry and flaky, the AAD recommends applying a small amount of petroleum jelly for moisture and protection.


TIP #2. STOCK UP ON EYE CREAM

Of course, eye cream will be your best friend when it comes to caring for dry eyelids. Look for options that have ultra-hydrating formulas to give your parched skin the moisture it craves, like the L’Oréal Paris Age Perfect Hydra-Nutrition Manuka Honey Eye Gel. This eye cream with manuka honey and nurturing oils helps cushion mature, very dry skin with nourishing moisture. The hydrating, cooling formula works together with the de-puffing rollerball wand to care for the delicate eye area. As a result, puffy bags appear reduced, dark circles appear brighter, and eyes look more youthful.

Read more


  • 0 Comments


Incorporating a facial massage tool into your regular beauty routine might just be the fast track to flawless skin – and now, you don't need to be a professional to own one.


So, what exactly are the benefits of these strange-looking gadgets? Generally speaking, using a tool to massage your face can alleviate tension in overworked muscles, (jaw-clenchers, we're talking to you), which not only feels heavenly but can also tone and lift your complexion.


By kicking your lymph system into gear, a jade roller or gua sha stone (more on that later), can shift toxins and blockages, meaning those long-lost cheekbones will soon reappear, higher and sharper than ever. Alternatively, pick a tool enhanced with vibrational technology, and it'll aid absorption of all those lovingly applied serums and creams, ensuring you see optimal benefits from your products.


According to expert facialist Sarah Chapman, working frequent massage sessions into your skincare routine will deliver welcome cumulative results. 'Regular use brightens, tightens, drains toxins and reduces puffiness by boosting the supply of vital nutrients and oxygen to your skin, giving you that immediate, fresh glow,' she says.


If all that hasn't got you convinced, consider the soul-soothing benefits too. These little tools are packed with stress-busting power – and we all need a little of that right now. Try rolling one over just-cleansed skin after an anxious day, and you'll soon see what we mean.


From holistic heroes Herbivore to skin-tech innovators Foreo – and, of course, Chapman's own cult contraption – all manner of beauty brands are now jumping on board, crafting tools from jade and rose quartz or using sonic technology to bring salon-standard results to you, at home.


Here, we've rounded up the best face massage tools, jade rollers and vibrating wands to start practising with now, along with exactly how to use them, and the results you can expect.


The best facial massage tools for your Friday-night facial


1. Black Obsidian Facial Roller – 


This black obsidian face roller not only looks incredibly chic, but is believed to eliminate psychic smog too. Failing that, the mind-soothing rolling motion is sure to set your chakras straight. 

Read more

  • 0 Comments


You can learn how to naturally lighten hair with some very easy home remedies! You can get started right away by following a few quick steps.

How Lemon Juice Works to Lighten Hair

Lemon juice creates photosensitivity, a heightened reaction to the ultraviolet rays of the sun. Lemon is highly acidic, so when you apply it to your hair, it will change the pH in your hair. The heat from the sun will force the hair cuticles to open, allowing the lemon juice to lift the pigment in your hair. If your hair has been chemically treated, lemon juice probably won't work, depending on the chemicals used to treat your hair. You might get a little lift, but chances are, you won't get any lift.


How to Use Lemon Juice and Water to Lighten Your Hair


First, you should at the very least dilute the lemon juice with water. No matter how tough your hair is, this will help protect it. You can also choose from a number of lemon mixture variations. Always use freshly squeezed lemon juice. You'll need a new/clean small spray bottle.

Supplies

Spray bottle

Towel to protect shoulders, clothing

Short Hair Ingredients

½ cup freshly squeezed lemon juice

½ cup warm water

Long Hair Ingredients

1 cup freshly squeezed lemon juice

1 cup warm water

Instructions

Pour the lemon juice and warm water into the spray bottle and shake to blend.

Wet your hair and towel dry until damp.

Comb your wet hair.

Spray the lemon/water mixture onto your hair, careful not to get it on exposed skin, especially your face.

If you accidentally get it on your skin, immediately wash it off. Don't go into the sunlight with mixture on your skin. The acidity can irritate your skin, cause a rash, or even cause sunburn.

Sit in the sun for a minimum of 30 minutes. If your hair is darker, you can add 10 minutes to your first treatment.

Read more

  • 0 Comments


Blackheads are the buildup of an over secretion of oil and sebum in the skin, and they essentially block our pores. Eventually, the buildup fills the pores and blackheads become more visible and prominent.


If you suffer with breakouts of blackheads, help is at hand!

DIY Face Masks to Beat Blackheads


1. Milk and Honey Mask


¼ cup milk 2 tablespoons honey Cotton balls or swabs

Mix milk and honey in a bowl. Dip a cotton ball or swab in the mixture and coat your face with it.

If you prefer, you can use thin cotton strips and soak them in the mixture before applying and leaving on your face.

Leave the mask on for 10-15 minutes, then rinse clean with warm water. Do this 1-2 times per week.

Milk contains lactic acid, which is a natural, mild exfoliator. It is easily absorbed into the skin, where it removes dead cells and helps unclog pores. Honey helps your skin to look bright and radiant.

2. Egg White and Lemon Juice


1 egg white 1 tablespoon lemon juice Facial brush

Mix the egg white and lime juice, and apply the mixture over your face with a facial brush, avoiding the eyes and eyebrows.

Leave on for around 10-15 minutes, and you will feel your skin tighten as the mask dries. Wash it off with cool water and follow up with a moisturizer. Do this once a week.

Egg white is a natural astringent, and works well as a toner. It shrinks your pores, and makes your skin look clear and blemish-free. Lemon juice is a natural bleaching agent, and helps to brighten your skin.

3. Cinnamon and Honey

1 tablespoon cinnamon powder 3 tablespoons honey

Mix the cinnamon powder and honey in a bowl until a thick paste forms. Apply the paste to your face, focusing on specific problem areas.

Leave it on for 20 minutes, then wash off with warm water. Do this every other day for two weeks and you will notice a change for the better in your skin.

Read more


  • 0 Comments


Great skin is not just about genetics, but our daily habits. In fact, our skincare routine has a large impact on how we look. But with so many product reviews and opinions, when it comes to our skincare routine, it’s hard to know what to do or how to do it. Whether you are a beginner or a pro skincare aficionado, a basic daily skincare routine will do justice to all skin types. Here is a basic 5-step skincare routine for minimal and effective care:

Step 1 – pH Balancing Face Wash Or Cleanser 


Cleansing your face is the most essential part of any daily skincare routine at home - Day or Night. Our skin comes in contact with environmental pollutants, dirt, and other factors each day that should be gently removed. Wash twice a day, morning and night, to avoid clogged pores, dullness, and acne.

Step 2 – Toner 


While toner is a common part of many basic skincare routines, it is purely optional. Applying toner with clean hands is the most efficient. Just pour a few drops in your palm, then swipe it on. Most formulas can be used morning and night, but you might want to use those with exfoliating acids only at night or every other day.

Step 3 – Serum 


In a simple way, serums are powerful skin allies. Filled with concentrated doses of active ingredients, these elixirs can mitigate a number of issues, from dark spots to wrinkles. “Even if you don’t have any specific issues, everyone still needs a general antioxidant serum in the morning to protect from daily aggressors. And there are a few products that you can use : 

  • Hyaluronic acid
  • Vitamin C 
  • Retinol, vitamin B3, peptides
  • Colloidal sulfur, niacinamide.


Step 4 – Moisturizer 


The second most basic and important step in a daily skincare routine is moisturizing. Be it a nighttime skincare routine or a daytime skincare routine, moisturization is a must. This skincare routine step helps lock in your skin’s natural moisture and keeps it from drying out throughout the day or night. It also helps to lock in the goodness of the serum you just applied. If you have a dry skin type, go for heavy moisturizing creams for intense nourishing. On the other hand, if you have oily skin, you can choose a gel moisturizer for some light hydration. No skin type should emit the step of moisturizer from their skincare routine. No matter how oily, acne-prone or irritated your skin is, there is a suitable moisturizer with nourishing ingredients and texture to help the situation.

Step 5 – Sunscreen 


The last step in the most basic, yet best skincare routine is that of protecting. Apply sunscreen 30 minutes before sun exposure, and reapply at least every two hours. Chemical sunscreens should be applied directly to clean skin, while physical blockers can be applied last in your skin-care regimen, but before makeup is applied.

For knowing top product picks, and want to know more extra skills check out our website which features the best Makeup session and the best product knowledge for the ultimate look.

Why follow: If you want awesome beauty tips as well as a slice of Makeup advice on the side, visit Cult Cutter's Instagram page.


Where to follow: Instagram (@cultcutter), YouTube (@cultcutter), www.cultcutter.com

If You Like this article? Share it with your friends by clicking the icons below!


  • 0 Comments


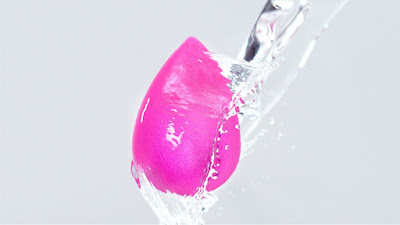
Makeup sponges have been a makeup artist favorite for years and the rest of the world is finally catching on. Using a sponge such as the Beauty Blender leaves a gorgeous, even finish that no other beauty tool can mimic. If you use it incorrectly, however, it can also leave your wallet a little thinner. Here's why you should always wet your makeup sponge before use: 


To Save Product (and Money!)


The number one reason to wet your sponge first is to save on product. In fact, Beauty Blender even put out a post stating that's how it's intended to be used!


If you don't wet your sponge first, it will soak up that expensive product like water. Doesn't that hurt just a little to think about?


Wetting your sponge thoroughly and letting it fully expand has to be your first step. Then, when you apply foundation or other product to it, it'll already be full of water and won't soak up so much product, saving you tons of product and money. 


For Better Performance


When your makeup sponge is damp, it makes product application way easier. It goes on more smoothly and ends up in an even, streak-free finish. 


This is an especially good method if your skin is dry, as there's no brush creating flakes across the surface. Your skin will love the extra moisture!


A word of caution, however: too much water can dilute the product and mess up the texture, so make sure to wring it out well after it's fully expanded. 

Read more


  • 0 Comments


Aloe vera has been used in medicine for thousands of years as it is believed to have potential health benefits for the skin and the body. The trendy succulent may seem innocuous to try but before you go rubbing the leaves all over your face, find out what dermatologists and physicians have to say about the best ways to use aloe vera. 


We spoke to Blanca Lizaola-Mayo, MD, Alicia Zalka, MD, Bita Nasseri, MD, and Kim Walls to get expert opinions on the different benefits aloe vera can provide. Keep reading to learn the eight best ways to use the ingredient.


Heal a Sunburn

Because aloe vera gel gives a cooling sensation and can relieve irritation, one of its top benefits is to help soothe sunburned skin. This is due to the gel's high water content, which spreads gently on the skin, and contains high concentrations of more than 75 active chemical constituents, including polyphenols, vitamins, minerals, and more that work synergistically to provide relief to damaged skin. Zalka explains, “[The gel] provides a barrier to the skin protecting it from further irritation and inflammation. It acts as a moisturizer without being too heavy or greasy, replenishing needed water to the epidermis (aids in preventing transepidermal water loss TEWL).”


02 Substitute for Shaving Cream

Down to the last drop of shaving cream? Not to fear, Aloe vera gel makes for a great shaving cream replacement as it helps create a friction-free skin surface.  “Because shaving can result in skin nicks, deep exfoliation, and potentially skin irritation, fresh aloe vera gel is an excellent ingredient in shaving products to offset unintended damage,’ says Walls.


03 Lower Your Blood Sugar

Some studies have suggested that drinking Aloe vera juice can help those with diabetes to manage their blood sugar levels. “Aloe vera juice could have several possible benefits for people with diabetes to achieve better fasting blood glucose levels, as well as reduce body fat and weight. However, research is still very much needed to support Aloe vera’s effectiveness in regards to lowering blood sugar and glucose levels,” says Blanca.


04 Heal Dry Skin

Nasseri confirms that aloe vera can heal dry skin as well. Whether it be your face or feet, aloe vera consists of vitamin E and vitamin C that work together to strengthen the skin’s barrier. Slather on before bed and wake up to smooth supple skin.

Read more

  • 0 Comments


For every woman out there over age 50 who knows that beauty comes from within, but who also wants to look the best you can, this article is for you. And, for those of you curious about plastic surgery, Botox injections, and fillers, so we'll cover that as well. There aren't many miracle fixes in these 12 tips, but there is a lot of advice I swear by, a few decent recipes, and an attitude that the years after age 50 are full of even more wonder and beauty.

Wear Sunscreen Every Day

I know it's tedious to constantly hear about the importance of sunscreen, but if there is one beauty rule I'd tell my 15-year-old self it's to wear a decent sunscreen every day. Nothing damages your skin more than exposure to the sun. It's the number one cause of brown spots, wrinkles, and skin cancer.1

Here's the catch: not all sunscreens are equal. You should choose a sunscreen of at least 30 SPF and you should choose one that blocks UVA and UVB rays.2


Three things to remember once you've found the right a sunscreen:


You should wear it rain or shine. UV rays break through cloud cover and it's important to make a habit of using sunscreen daily.2 And don't worry, it won't clog your pores as long as you cleanse your face at night.

Reapply throughout the day. The renowned dermatologist Patricia Wexler insists that all women (whatever their skin tone) reapply sunscreen throughout the day.

Slather some on top of your hands. Dermatologists say they can tell a woman's age by looking at her hands, in addition to her neck. 


Product recommendations: I prefer tinted sunscreen because it doesn't leave a white cast on my face and it evens out my skin tone. Neutrogena makes a good drugstore version, however, my favorite (recommended by my dermatologist) is the pricey but fabulous La Roche Posay tinted sunscreen. Apply sunscreen with a foam sponge for a more even application.


Make Sure You Have the Right Cleansers and Moisturizers

It's very important to choose cleansers, moisturizers, and a skin care routine formulated for your skin type.

If you have oily skin, consider yourself lucky. Oily skin tends to develop fewer wrinkles.3 If you have sensitive skin, you should test all of your products on your neck or arms before you use them. That product you loved a few years ago may (as you advance in age) now cause redness.

You may have also noticed the older you get, the drier your skin becomes.4 As we age, our skin suffers a slowdown in oil production and cell turnover, especially after menopause. I noticed my naturally oily skin turned as dry as the Sahara Desert at age 35.

Read more

  • 0 Comments


Most women find the process of taking off mascara incredibly annoying. You rub, you wipe, and the stuff just keeps coming off—it’s no surprise some women decide not to remove mascara and go to sleep with their lashes loaded instead. “Mascaras are an emulsion of water, pigments, oils, and waxes, so can be tough to take off,” says cosmetic chemist Ron Robinson of BeautyStat.com. But choosing the right cleansers and using the right technique can help with mascara removal. Here, beauty pros weigh in on their top dos and don’ts when it comes to taking off mascara.


Do: Use a 100 Percent Cotton Pad

“One that’s lint-free and resistant to shredding,” says New York City dermatologist Joshua Zeichner, MD, director of cosmetic and clinical research, department of dermatology, the Mount Sinai Hospital. “My wife swears by Swisspers, which she buys in bulk at Costco.”


Don’t: Use a Cotton Ball

“Any loose fibers can get into your eyes,” says Angela Caglia, celebrity facialist and co-founder of Angela Caglia Skincare. Use cotton balls for facial astringents and toners, not for removing mascara.

Do: Choose a Biphasic Eye Makeup Remover

These formulas are made of two parts—a cleansing oil to remove mascara and other makeup and water to cleanse the skin after the mascara has been removed, notes Zeichner. “They’re great because they take off all types of mascara, even waterproof.”

Don’t: Use Alcohol- or Fragrance-based Products

“They can strip and dry out the skin on the delicate, moisture-challenged eyelids, leading to irritation,” says New York City dermatologist and host of DermTV.com, Neal Schultz, MD.

Do: Press a Makeup Pad Soaked in Remover Against the Eyes for 30 Seconds

“It’s important for the solvents to dissolve the polymers and pigments and break down the mascara,” says Caglia. “This is key to avoiding aggressive rubbing and pulling on your lashes later on.”


Read more

  • 0 Comments


Great skin is not simply a matter of DNA — your daily habits, in fact, have a big impact on what you see in the mirror. But depending on which product reviews you read or doctors you consult, there is a dizzying number of opinions on everything from how to moisturize to how to protect yourself from UV rays. Ultimately, caring for your skin is simply personal. Here’s what you should keep in mind to sort through all the noise.


Skin Care Tips Before You Start

Three Main Steps

Think of your skin-care routine as consisting of three main steps:


Cleansing — Washing your face. 

Toning — Balancing the skin.

Moisturizing — Hydrating and softening the skin.

The goal of any skin-care routine is to tune up your complexion so it’s functioning at its best, and also troubleshoot or target any areas you want to work on. “Beauty routines are an opportunity to notice changes within yourself,” says the San Francisco skin-care specialist Kristina Holey. As your skin needs shifts with age, so will your products. Still, she adds, “it’s not about creating perfection.”   Allow these three steps to become your daily ritual that fortifies your skin and grounds your day.

Give it Time

The science behind skin-care products has come a long way but there’s still no such thing as an instant fix — you need time to reap the benefits, says Dr. Rachel Nazarian, a Manhattan dermatologist at Schweiger Dermatology Group. “Results are only seen through consistent use,” she explains. Generally, aim to use a product over at least six weeks, once or twice daily, to notice a difference.  

Tip: With any skin-care product, apply in order of consistency — from thinnest to thickest. For example, cleanser, toner (if you use it), serum, and then moisturizer.

Read more

  • 0 Comments


Struggling to find your shade? Us too! We know it can be tricky doing this online, and we're here to help! 


Step 1: Pick a spot to look at your skin filled with natural light 


Step 2: Identify your undertone by answering these 3 questions:  


1. Do the veins in your forearm appear more purple-blue, blue-green, or green? 

COOL - Veins will appear purple or dark blue 

NEUTRAL - Veins will appear blue-green 

OLIVE - Veins will appear blue-green 

WARM - Veins will appear green or olive


2. What jewelry are you drawn to, or naturally look best in? 


COOL - Look best in silver, platinum, or rose gold 

NEUTRAL - Look great in all jewelry 

OLIVE - Look best in gold

WARM - Look best in gold 


3. How does your skin react to sun exposure? 

COOL - Turns red or burns easily 

NEUTRAL – Skin tans, but can also become red 

OLIVE - Tans easily, but can also become red

WARM - Tans easily

Still unsure? ​ 


In natural light, take a picture of yourself wearing a pure white piece of clothing. What color in your skin is most apparent? ​ 


If your skin looks pink or rosy by comparison, you're cool toned. ​ 


If your face looks more yellow, your undertone is warm. If you feel you look better in off-white or creamy hues rather than stark white, that's another telltale sign of a warm undertone. ​ 


If you can wear both stark white and off-white without feeling like you look washed out, you probably have a neutral undertone. ​ 


Olive undertone will also look good in both colors but will see more green in their skin when wearing the stark white. ​ 


Step 3: Defining your overtone: 


Your overtone is where your skin sits on the spectrum of fair to deep. Here are some guidelines for how different skin undertones typically fall in this range: 


COOL - Typically light to fair skin tone 

NEUTRAL - Typically fair to deep skin tone 

OLIVE - Typically light to medium skin tone 

WARM - Typically light to deep skin tone 

EXPERT TIP: If you feel between two shades, it’s best to go with a shade that’s too warm rather than too light. 

Read more


  • 0 Comments
Older Posts Home

About Cult Cutter

a


Cult Cutter

One-Stop destination

for

Beauty • Wellness • Styling


Follow Us

  • Visit Website
  • Instagram
  • Facebook

recent posts

Labels

Beauty Styling Wellness

instagram

© Copyright - Cult Cutter 2020

Template Created By : ThemeXpose Distributed BY: Blogger Templates

Back to top